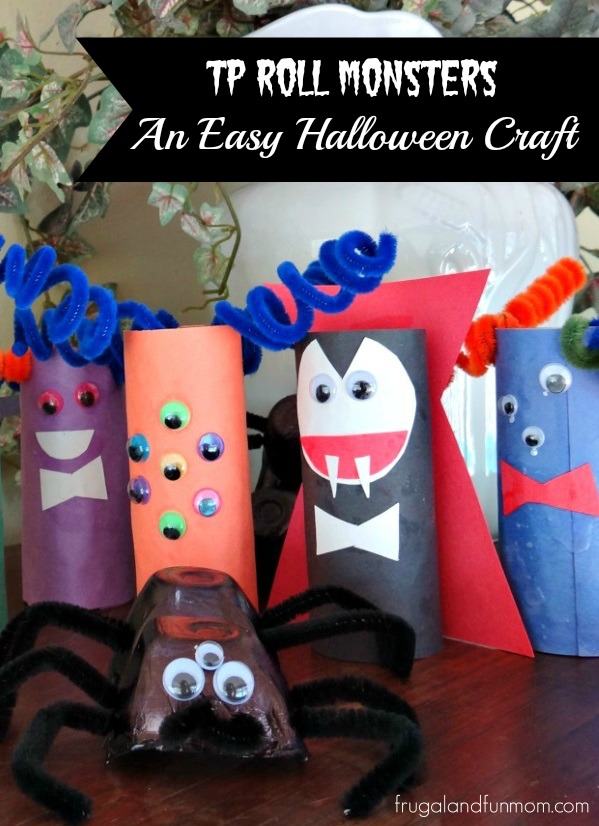
Wanting to create a fun homemade Halloween project using items that you have on hand? Toilet paper cardboard tubes are something I have an endless supply of, so after some thought my kids and I decided to turn them onto TP Roll Monsters. If you would like to recreate this project, you will need the […]
Tutorial – Egg Carton Spiders! A Child’s EASY Halloween Craft!
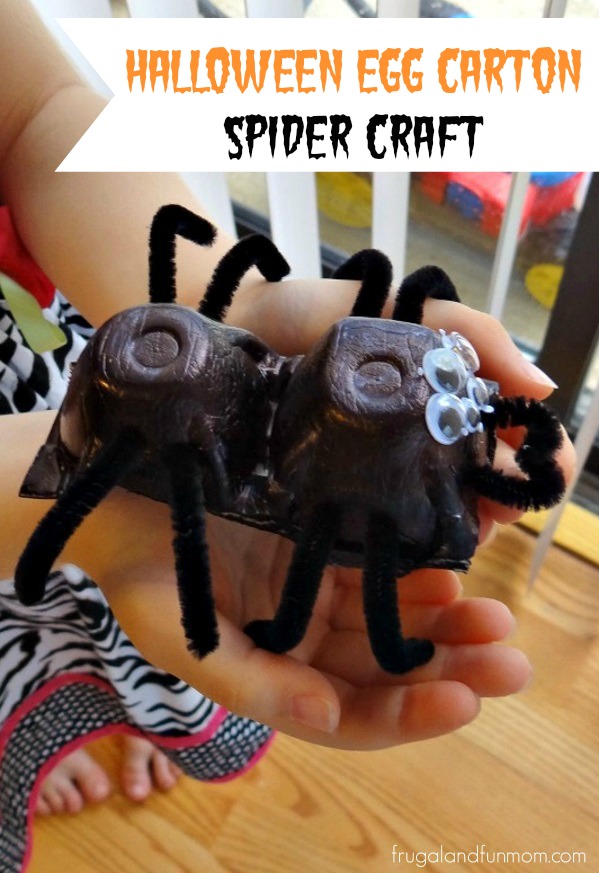
I love Halloween because it is such a fun time of year, and I also enjoy the crafts and decorations that come along with it. My kids enjoy it as well, and this year we made Egg Carton Spiders! If you would like to recreate this project, you will need the following: – Egg Carton – Wiggle […]
Superstar Frame Craft! A Great Way To Display Your Child’s School Work!
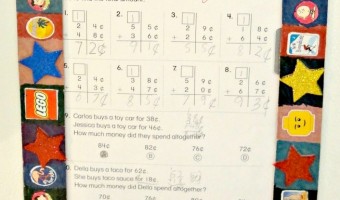
School is back in session, and that means our children will be bringing home works of art, spelling tests, math sheets, and other projects that they are proud of and want to display. Personally, my regular magnets don’t always do a great job of holding these beautiful creations and “Superstar” school sheets up on my […]
My Dad Is Special Because Craft, Upcycled Gift For Father’s Day!
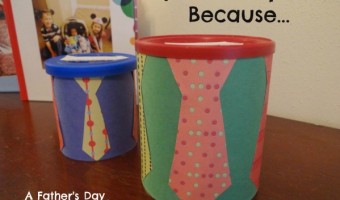
Father’s Day will be here in a few weeks and if you are looking for some gift inspiration, here is a craft that my kids made for their Dad. We took everyday household items, along with containers destined for the recycle bin, and turned them into a fun meaningful Gift For Father’s Day. This can easily […]
Turning Garage Sale Find Galvanized Buckets Into Spring Decorations! Flower Arrangement DIY Craft!
I went garage sale shopping a couple of weeks ago, and came across 2 neat looking galvanized buckets. They were $2.50 a piece and looked brand new, so I knew I was getting a deal. I also figured I could turned these into a pretty decorative item, so I bought them and brought them home. I […]
- 1
- 2
- 3
- …
- 6
- Next Page »